API Keys
HollaEx has two kinds of API key. Choose the one with the least access that still does the job.
| Admin key | User key | |
|---|---|---|
| Acts as | The exchange operator | One user account |
| Can call | Admin, user and public endpoints, plus the admin WebSocket channel | User and public endpoints only |
| Typical use | Back-office, onboarding, accounting, custody and payment integrations | Trading bots, market making, portfolio tools |
| IP whitelist | Required | Optional (recommended) |
| Where to create | Operator Controls → Exchange → Configuration → Security | User account → Security → API Keys |
If a user key calls an admin endpoint, the request is rejected with 403 Access denied.
An admin key can move funds and change any user. Never put it in a website, mobile app, public repository or a client-side bundle. Load it from a secret manager or environment variable on a server with a whitelisted IP.
Create an admin key
The admin account needs 2FA turned on before it can create keys.
-
Go to Operator Controls → Exchange → Configuration → Security.
-
Scroll to API Keys and click Generate API Key.
-
Fill in the form:
- Name: something that identifies the integration, for example
accounting-sync. - IPs: the server IP addresses allowed to use this key. The key won't work from any other address.
- Key type: Admin.
- Name: something that identifies the integration, for example
-
Confirm with the code sent to the admin email and your 2FA code.
-
Copy the secret now. It is shown once and disappears when you refresh the page.
-
Set permissions:
- Read: read data such as users, balances, orders and deposits.
- Write: change state, such as creating users, deposits and withdrawals, transfers and orders. Only enable this if the integration needs it.
Turn on admin API endpoints
Admin endpoints are off by default. While they are off, admin endpoints only answer an operator signed in to Operator Controls, and admin API keys are refused. To use an admin key:
- On the same Security page, set the Admin IP allowlist to the addresses your integration calls from (IPv4, IPv6 or CIDR ranges). Changing it needs an emailed confirmation code and your 2FA code.
- Turn on Admin API endpoints.
Leave admin API endpoints off unless you actually use the admin API.
Create a user key
Any user, including a test account you create for development, can make their own keys:
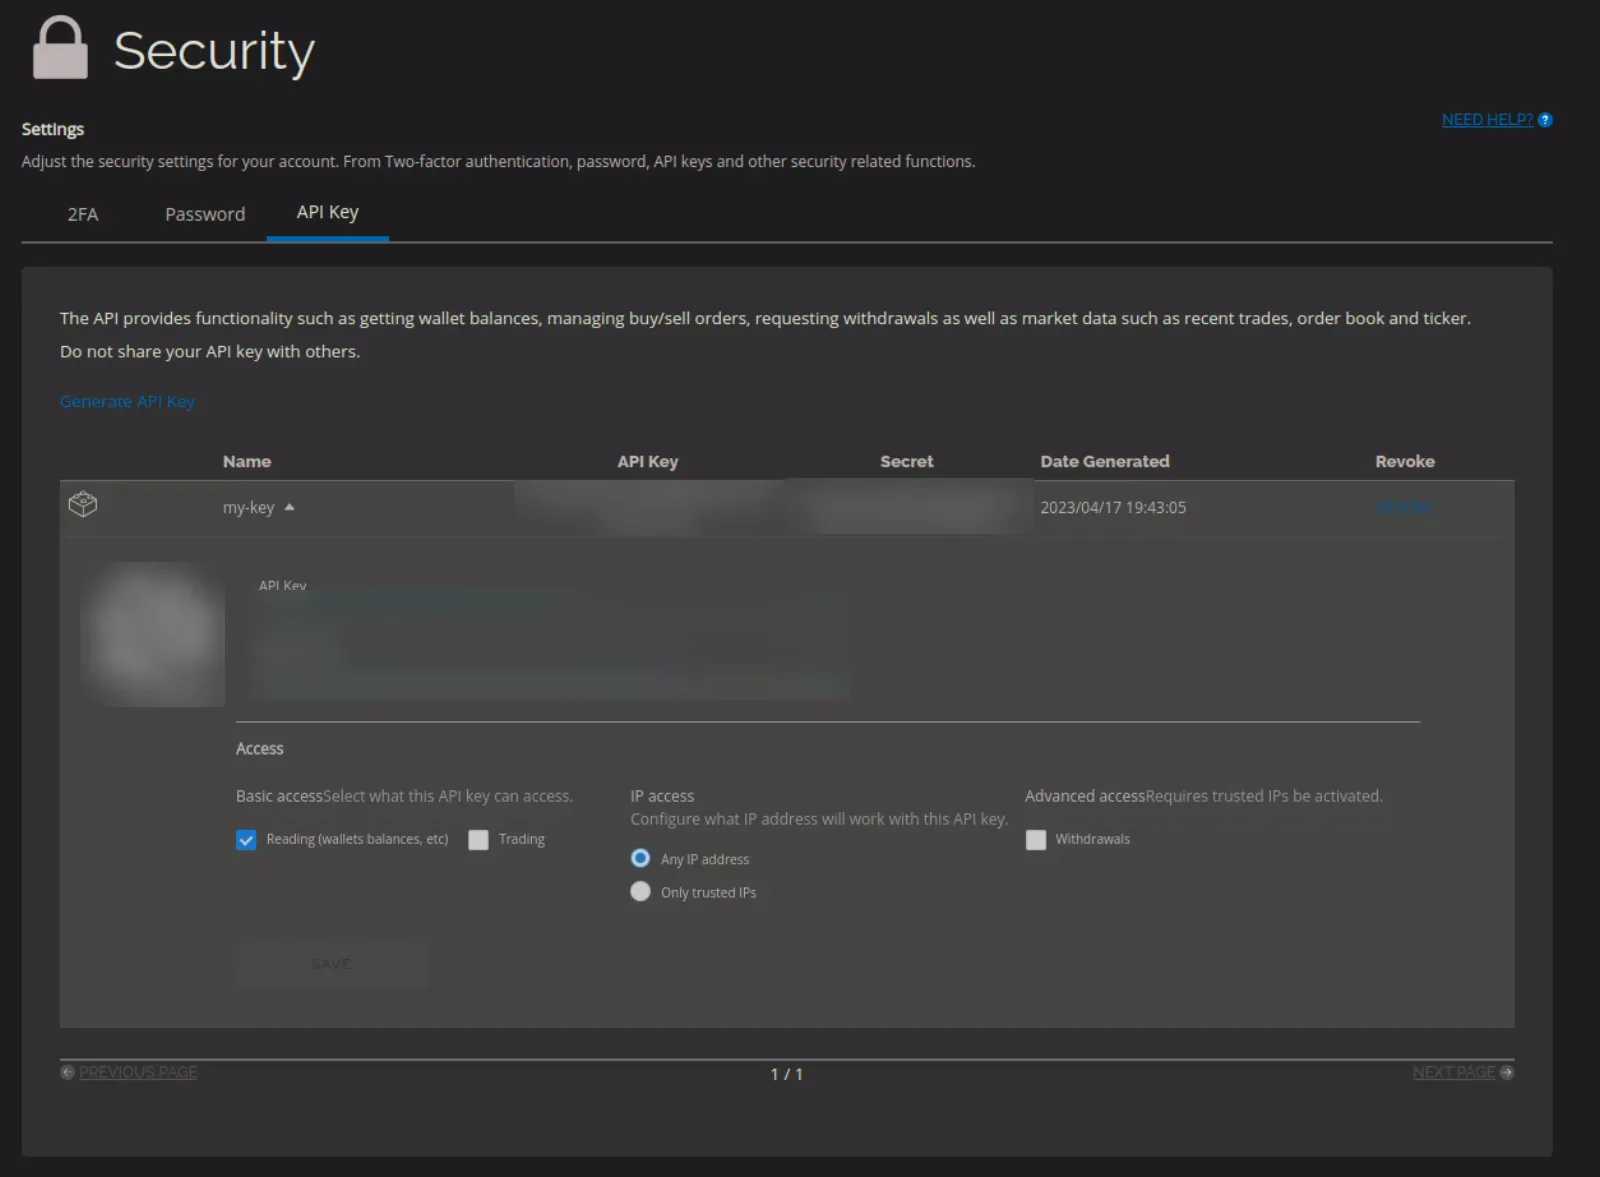
- Log in and open Security → API Keys. 2FA must be on.
- Click Generate Key, name it, and confirm with the security codes.
- Copy the secret straight away.
- Enable only what the bot needs: Reading, Trading, and Withdrawal only if it must withdraw. Add an IP whitelist if your bot runs on a fixed IP.
Security checklist
- One key per integration, so you can revoke one without breaking the others.
- Read-only unless write access is truly needed.
- IP whitelist on every admin key, and on user keys where possible.
- Secrets are kept in a secret manager or env vars, never committed to git.
- Rotate keys regularly, and revoke them straight away if they leak or a team member leaves.
- Test against a test account before pointing a bot at real funds.